Kids Bike Ramps: 30+ Ideas to DIY or Buy!
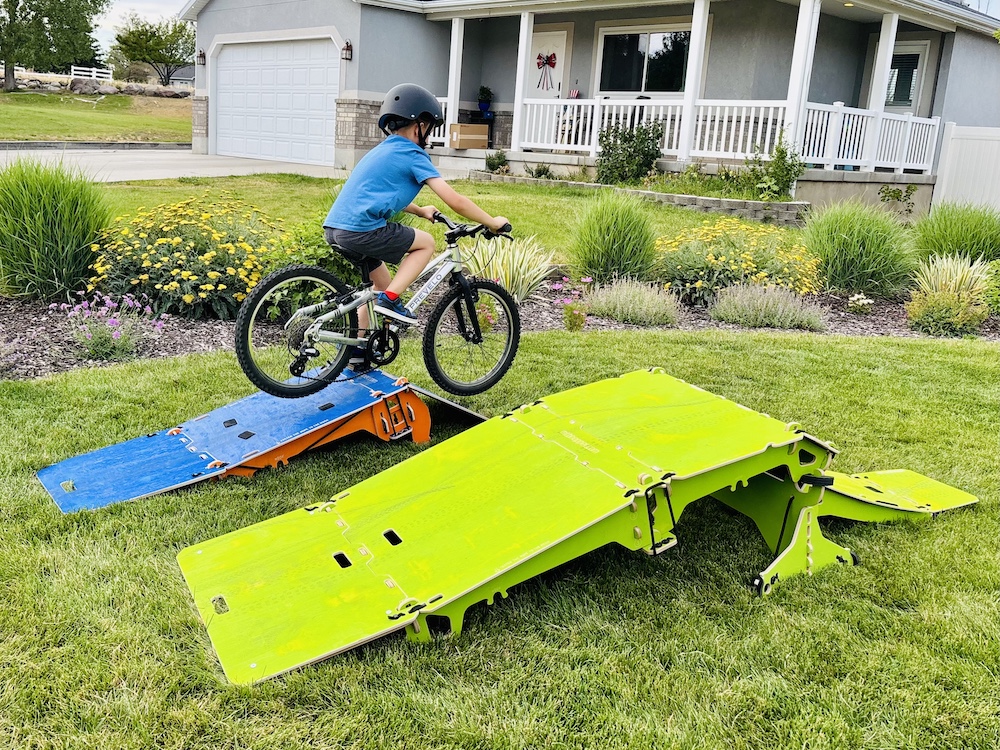
Bike ramps are for everyone! Kids of all ages and skill levels love a good ramp, and bike ramps for kids come in many shapes and sizes — you’re really only limited by your own creativity (and maybe your building skills, ha!).
From roller ramps to kickers and teeter totters, we’ve built our own or found rad examples from our Two Wheeling Tots community to get you inspired. And if you don’t feel like going the DIY route, we’ve rounded up the best ramps you can buy (like the MTB Hopper ramps shown above).
But which bike ramp is best for your kid?
What ramp and ramp style that is best for your kids depends on their skill level and how aggressive they want to be. If your looking for a fun activity for riding in front of the house, a basic roller or tabletop ramp is a great place to start, but if your looking to improve on specific skills for MTB or BMX riding, a kicker ramp or skinny might be what you need.
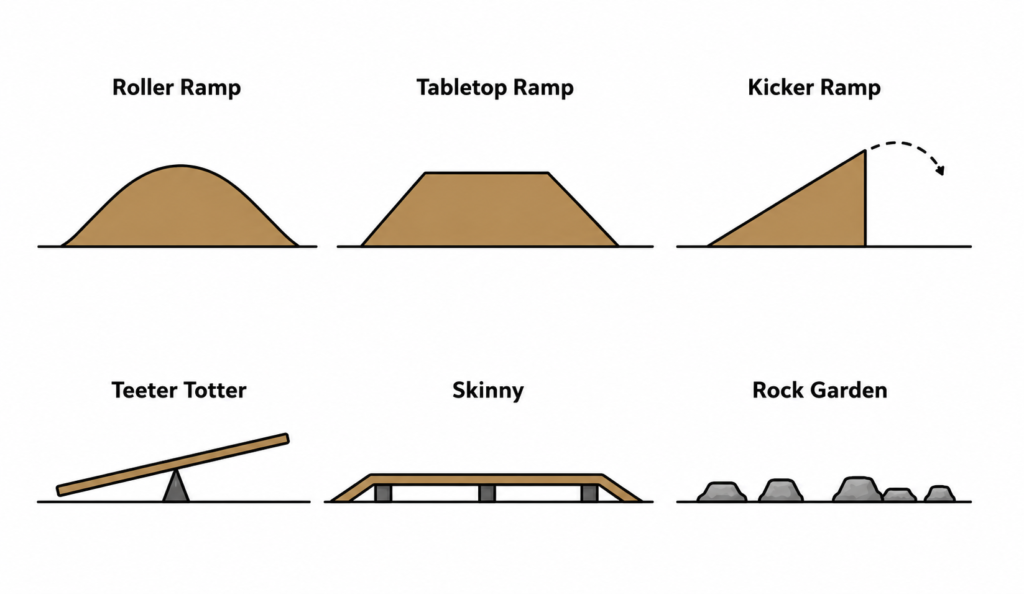
Different Ramp Styles
From kickers to skinnies, here a quick run down of the different styles of ramps available. All of these ramps styles can be used from beginning to advances riders (depending on the rider and the height of the ramp), except kickers, which should only be used for intermediate to advanced riders.
| Ramp Type | What is it? |
|---|---|
| Roller Ramp | A smooth, rounded hump you ride up and over, like a mellow speed bump. |
| Tabletop Ramp | A ramp up, a flat platform, then a ramp down, a forgiving jump with a landing built in. |
| Kicker Ramp | A short, steep launch ramp with no ramp on the landing side. Built for actual jumping and airtime. |
| Teeter Totter | A long plank balanced on a center pivot that tips as you ride across it. |
| Skinny | A narrow plank or beam, flat or slightly raised, that trains balance. |
| Rock Garden | A patch of rocks, roots, or wood chunks to ride over. Trains obstacle clearing. |
Roller Ramps
Skill Level: Beginner to advanced
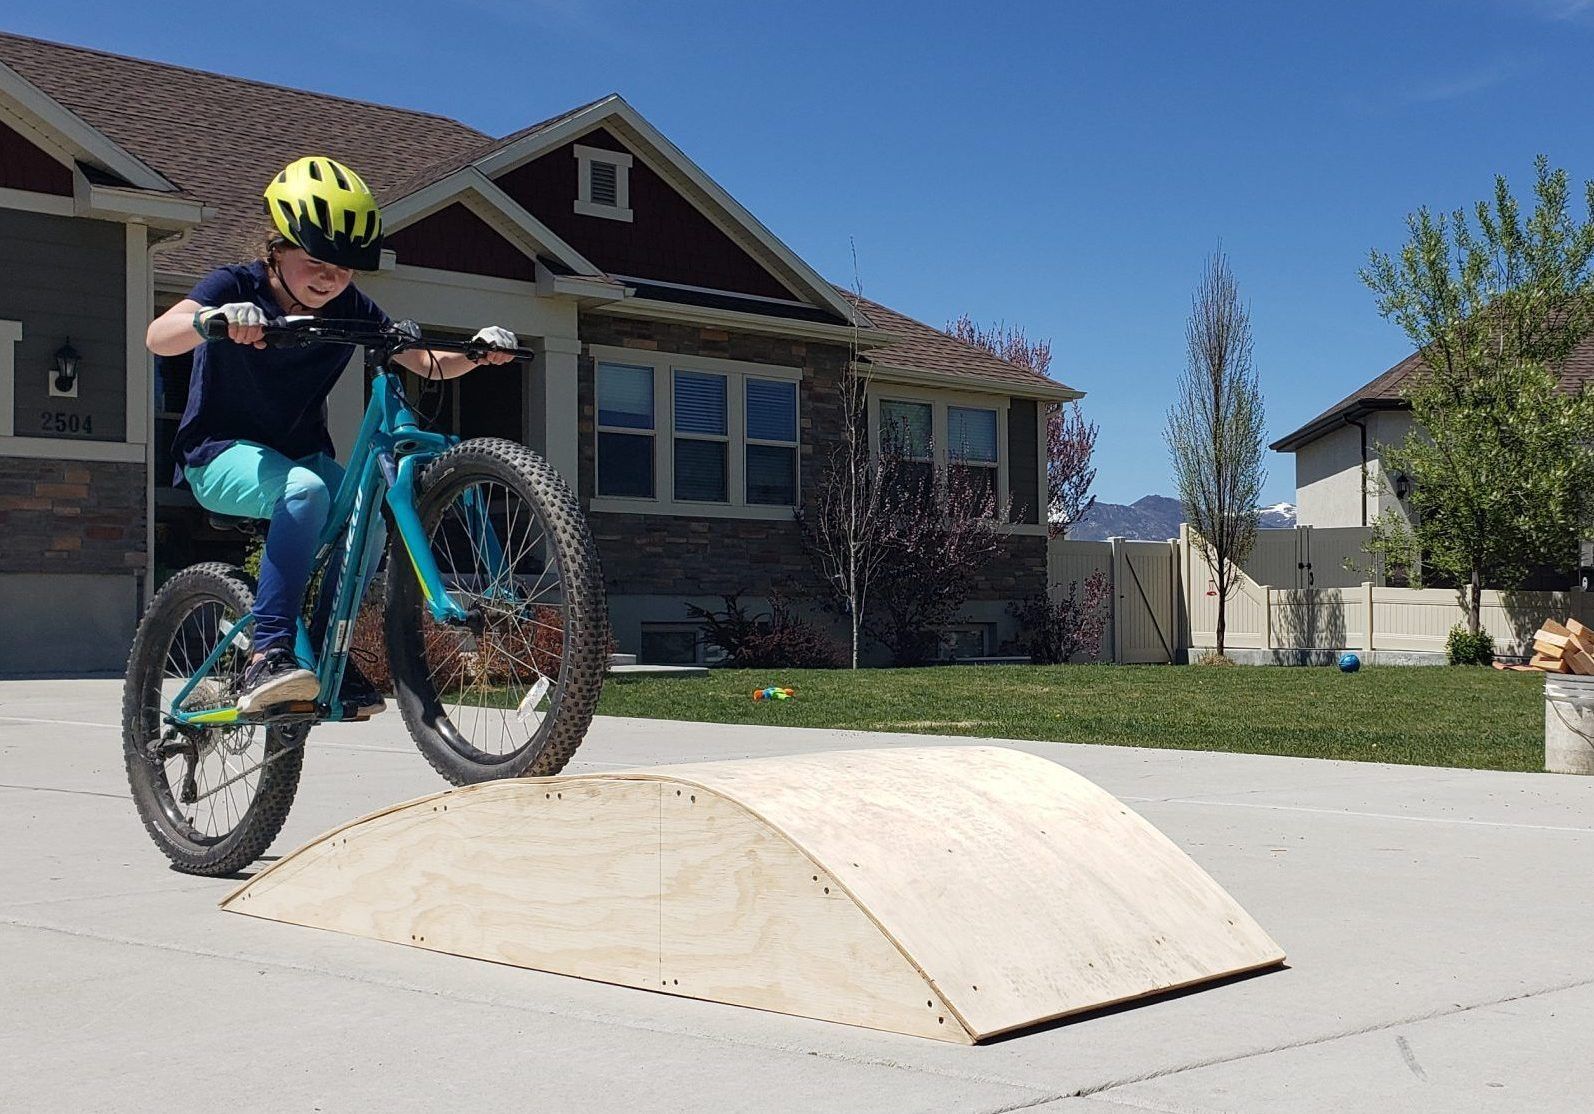
- Beginner Riders: Roller ramps with gentle slopes are generally the most fun for your average bike rider. Rolling up and over mimics the fun of a roller coaster and can be as easy or aggressive as you want it to be!
- Balance Bikes: If you intend to use a roller for a balance bike, you’ll need a ramp that’s squatter with less aggressive slopes. Keep this in mind whether you’re building or purchasing a ramp.
- Intermediate/Advanced Riders: For kids looking to get more aggressive, rollers teach the art of pumping, approaching, and flowing up and over..
Roller Ramps Purchase Options
- Elevate Outdoor: Sturdy and easy to move around. Bridge between the two ramps is steeper, so not ideal for bikes with longer wheelbases (or scooters).
- MTB Hopper WAVE: Two connected ramps with a bridge between them (about 92″ long, 28.5″ wide) built specifically as a pump ramp for kids. Easily convert to a kicker ramp as kids progress.
- Freshpark BMX DoublePump Track: Best for intermediate to advance kid riders, 20″ height.
- OC Ramps Jordan Hoffart’s Speed Bump: Best for beginner riders and up! Balance bikers could enjoy this roller as the width is 48″ and the slope is mellow.
DIY Roller Ramp – Tips and Hacks
While we are no experts at ramp building, we have quickly become ramp-building fans! Sometimes it’s just a matter of diving in and learning for yourself. Here are some considerations for building a DIY roller ramp as well as some inspiration from our Two Wheeling Tots community.
Getting the Ideal Shape
- Curve: When building a roller you want a curved top, versus a peaked top. A peaked top will create an abrupt transition that is not good for pumping, jumping, or flow.
- Height: Most basic ramps start at a height of 1′ to 1.5′. With that height, your curved top may be somewhere from 2′ – 4′. If it’s for a balance biker, you will want to create a less aggressive slope. Let us know what dimensions end up working for you!
- Transition Ratio: Backyard Trail Builds talks about appropriate ratios for roller ramps. This will be important if you plan to use a series of roller ramps. A 1:1 ratio is great for beginners, a smooth ride and good for rolling speed. 2:1 is an expert level pump track. A ratio higher than 2:1 is generally for jumping. Learn more from him!
- Length of Base: The length of the base will largely determine the angles of the slopes. If the slope is too steep, balance bikers and young pedal bike riders will have difficulty “climbing.”
- Width: 24″ – 30″ wide is pretty average. Ramps narrower than 24″ take focus – keep in mind the age and skill level of your rider. We would not recommend anything narrower than 24″ for a balance biker who needs enough width to put their feet down.
Bending the Wood
- If you’re using plywood for the deck of your ramp, you’ll have a pretty aggressive curve to warp it to. But not to worry, the water trick works! Nail the plywood to the base at to one end of the ramp, then douse the deck in water. Weigh down the other side of the deck until it eventually warps to your ramp base. We used 11/32″ plywood and it warped in about an hour!
- You can also cut slits on the reverse side of the plywood to help bend it to your ramp, but you may lose some strength in the plywood with this method.
Transportation and Storage
- Coaster wheels: We put small coaster wheels on the side of our kids bike ramps to make transporting and storing easier.
- Handle: You may also consider putting a handle on the side of your ramp for easier transporting.
- Two Halves Make a Whole: Storage is always a concern with DIY ramps. You may consider building two ramps that complete a roller ramp. But if you do that, make sure you find a way to secure your ramps together.
Building Plans
- Two of our Two Wheeling Tots moms recently completed their own DIY roller ramps, following Seth’s Bike Hacks Family Ramp. While in theory this is a great family ramp, it will not work for balance bikers.
- The ramp dimensions are 6′ long, 1′ high, the slope leading up to the curved peak is 4′ long and the down slope is 2′ long. The slope on the tail-end of the ramp is too steep for balance bikers.
- So if you were planning on building this ramp for balance bikers we’ll save you the trouble – it won’t work. If you stretched your roller so each side was 4 feet – that would be a different story.
- Check out Backyard Trail Builds for the perfect wood roller, intended for a backyard pump track! You can also check out his follow-up video on building his Backyard Pump Track!
- Check out this DIY Wood Roller Build by Nj Jefferz. He builds a series of rollers to simulate a pump track, but his build is more transportable. He builds two ramps to complete a roller and designs his rollers to stack and store well next to each other.
Tabletop Ramps
Skill Level: Beginner to advanced
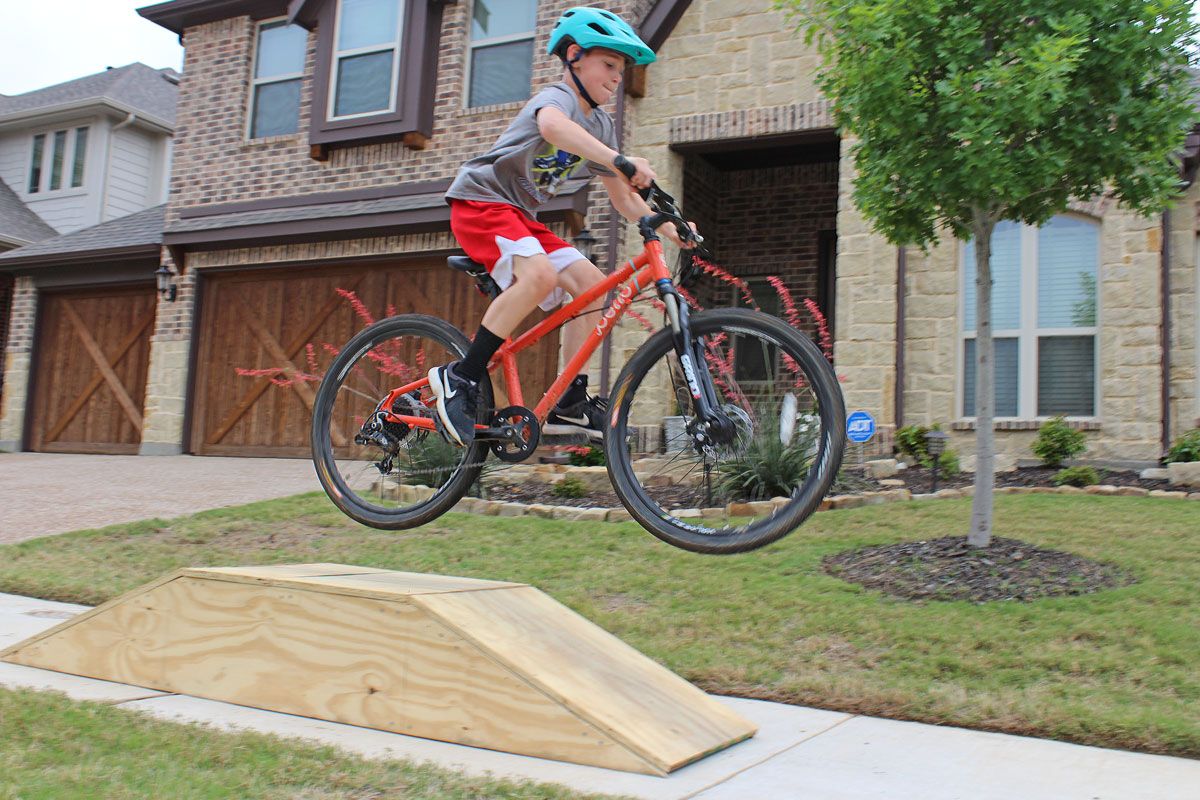
- Beginner Riders: Beginning or non-aggressive pedal bike riders use tabletop ramps much like rolling ramps, simply riding up and over.
- Balance Bikes: Balance bikers love tabletops because the platform gives them a place to stand in all their glory. Again, balance bikers need a tabletop with gentle slopes.
- Intermediate/Advanced Riders: Tabletop ramps are generally the next step up from a roller ramp. They help kids practice takeoff and jumping while providing a landing in case they come up short. More advanced riders begin to jump and clear the tabletop entirely.
Table Top Purchase Options
- MTB Hopper Coach + Intro: Designed so two kicker ramps can be locked together. While it’s not a true table top, it does simulate the motion while also converting to a kicker as your rider progresses.
- Landwave Skateboard Deck and Ramps Set: These ramps and deck are extremely durable, modular (multiple sets connected together) and are over 2 feet wide so they are great for all levels, even balance bikers.
- Byclex Portable Table Top: Tabletop is about 16.4″ wide, a little narrow for a balance biker.
DIY Tabletop Ramp – Tips and Hacks
Here are some considerations for building a DIY tabletop ramp as well as some inspiration from our Two Wheeling Tots community.
Dimensions
- Height: Most basic ramps start at a height of 1′ to 1.5′. We’re all about ramp progression and safety, let your child master a smaller, less aggressive ramp before building the crazy ramp of your dreams. Even professionals have fun on ramps that run just a foot high.
- Width: 24″ – 30″ wide is pretty average. Anything less requires focus and gets more technical. We don’t recommend a width narrower than 24″ for a balance biker.
- Length of Base: This largely determines the angle of the slope. Too steep, and balance bikers and young pedal bike riders will have trouble climbing, though a steeper slope is great for older riders using the ramp for jumping.
- Length of Platform: For a balance biker, extend the length of the platform since they like to hang out at the top. Measure the length, or wheelbase, of their bike to make sure it’ll fit, we recommend at least 24″ long.
Transportation and Storage
- Coaster wheels: We put small coaster wheels on the side of our ramps to make transporting and storing easier.
- Handle: You may also consider putting a handle on the side of your ramp for easier transporting.
Building Plans
- Here is a DIY tabletop build specifically for balance bikes from JGentryMTB.
- Check out this DIY tabletop build from I Like to Make Stuff. This ramp has a curved kicker that can be separated from the tabletop. You get two different style kids bike ramps with this build -a tabletop and a kicker!
Kicker Ramps
Skill Level: Intermediate to advanced
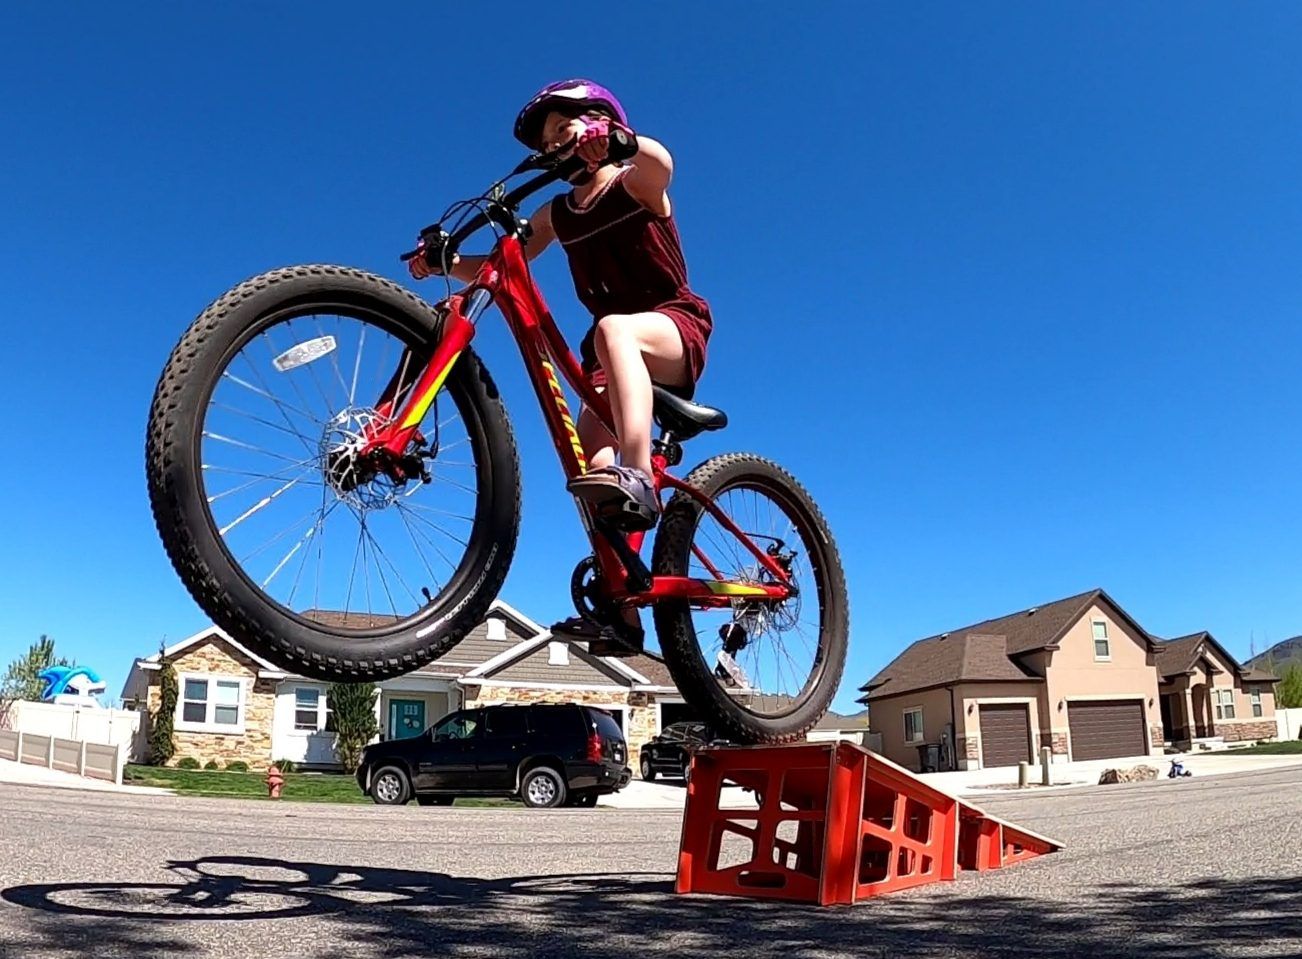
- Beginner Riders: Kicker ramps aren’t great for beginner riders unless the drop height is minimal. You can push the kicker up against a curb or sidewalk to lessen the drop height for beginners, but overall, be cautious pairing beginner riders with kickers.
- Balance Bikes: Not recommended for balance bikers
- Intermediate/Advanced Riders: Kickers are generally for kids who’ve mastered jumping a tabletop ramp. Like tabletops, kickers teach jumping and launching, but they’re less forgiving since there’s no safety net on the other side. A kicker can also double as a landing ramp from another ramp, a tabletop, roller, or another kicker. Kickers also come in a variety of heights. The more advanced the rider, the taller kicker they can safety ride.
Kicker Ramp Purchase Options
- MTB Hopper INTRO: Wood construction, but portable. Height adjustable from 11.4″ to 13.8″
- MTB COACH + MINI PAD: The COACH kicker ramp adjusts from 14″ to 31″ and has an adjustable lip to allow for everything from a soft roll to a big launch. The MINI PAD pairs with the COACH for softer and safer landings. It adjusts from 17.7″ to 22.6″ and has suspension to help soften harder landings.
- Freshpark BMX Jump: Metal construction for durability, 16″ tall.
- Landwave Ramp Pack: Plastic, yet very durable, 12″ tall
- OC Ramps Widge Bump: Sturdy wood construction, 12″ tall.
DIY Kicker Ramp – Tips and Hacks
We have yet to experiment with building kicker ramps, but they are often the easiest ramps to build! Here are some considerations for building a DIY kicker ramp as well as some inspiration from our Two Wheeling Tots Community.
Dimensions
- Height: 1′ – 1.5′ is plenty high for a kicker ramp. We encourage you to be conservative in your kicker ramp heights if you don’t have the ability to teach technical jumping or your child is not in lessons teaching those specific skills.
- Width: 24″ – 30″ wide is pretty average for a ramp. Anything narrower than 24″ takes focus. With kickers you may see narrower widths like 16″.
Curved Kickers
- If your kicker has a mellow curve to it (this creates more of a kick at the end) use a piece of PVC pipe to help trace the curve, before cutting your wood out. You may also need to warp your plywood if your kicker is slightly curved. The water trick works! Nail down your plywood to one end of the ramp, douse the plywood in water and weigh it down until it eventually warps to your ramp.
Transportation and Storage
Transporting and storing a kicker ramp is pretty easy. They can be built much smaller than a roller or tabletop ramp. You can still utilize these hacks below, but they may not be necessary.
- Coaster wheels: We put small coaster wheels on the side of our ramps to make transporting and storing easier.
- Handle: You may also consider putting a handle on the side of your ramp for easier transporting.
Building Plans
There are many plans for kicker ramps out there, but here are a few videos that you could refer to.
- This DIY kicker ramp is so portable it can fit in your bag and the cost to build it is roughly $12. This would be a great kicker for beginners, but even a professional has fun with it! Check out Sam Pilgrim’s portable kicker ramp build!
- This is another portable DIY kicker ramp, but with a little more height to it. Check out this Seth Bike Hacks kicker ramp build.
- Check out this kicker ramp build from Undialed that is 1.5′ high and 4′ long. This video also teaches you how to use the Pythagorean Theorem in building ramps.
Teeter Totters
Skill Level: Beginner to advanced
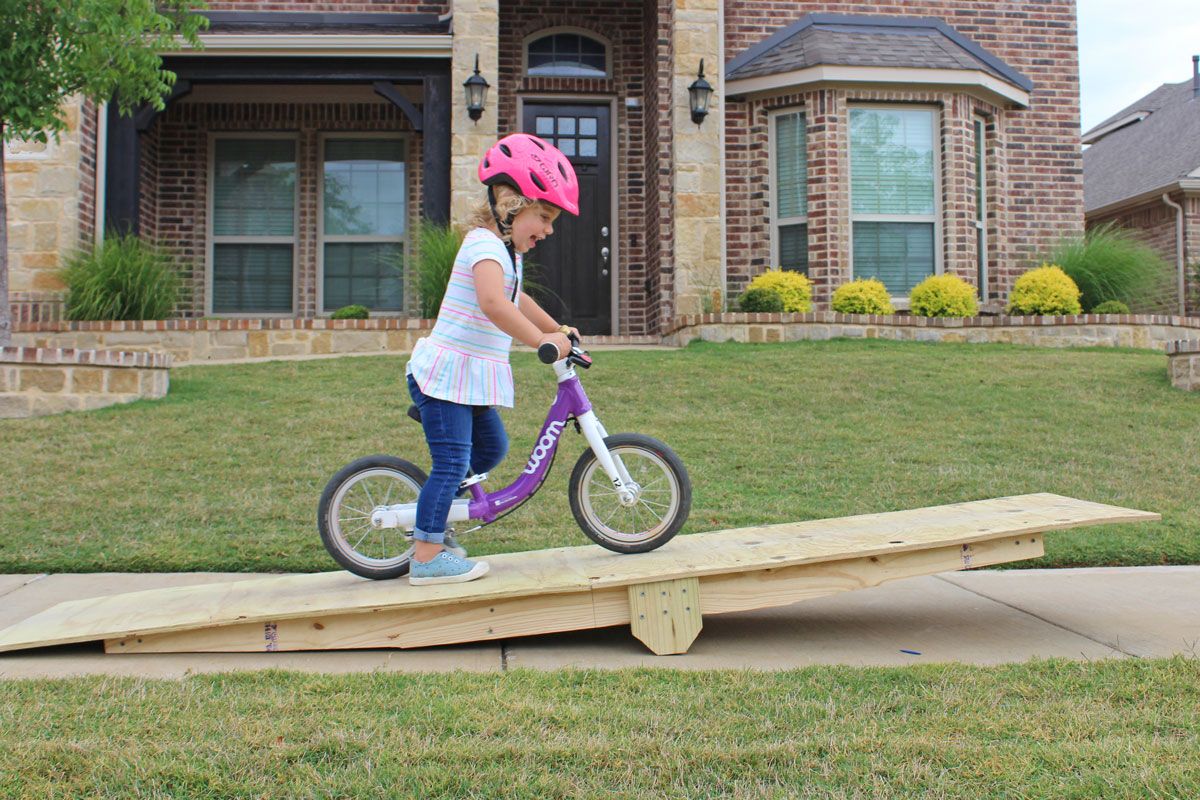
- Beginner Riders: Teeter totters are great for riders of every level, including beginners. They help promote balance on the bike. To help prepare a beginner for a teeter totter, have them practice on skinnies first.
- Balance Bikes: Teeter totters can be one of the best features for balance bikers to enjoy, as long as the teeter totter is wide enough. They’ll simply go up and down, over and over again!
- Intermediate/Advanced Riders: Teeter totters can accommodate advanced riders when built or designed narrower or higher off the ground.
Purchase Options
- MTB Hopper’s Skinny Set: (see the Skinnies section below) includes a modular “swing balancer” piece that works like a purchasable teeter totter — worth a look if you’d rather buy than build.
DIY Teeter Totter Tips and Hacks
While there are not many options for purchase, there are lots of plans online for teeter totter builds. Here are some considerations for building a DIY teeter totters as well as some inspiration from our Two Wheeling Tots community.
Dimensions
- Height: The teeter totter shown above has a 6.5″ fulcrum. Both our balance biker and our intermediate kid riders love it. It is also possible to design your teeter totter base to have adjustable heights accommodating more levels of riders or progression for your child.
- Width: 24″ is a comfortable width, and easy to make with 4′ x 2′ plywood sheets. We would not recommend anything narrower for a balance biker or beginner rider. However, as you create more technical teeter totters you will want narrower planks than 24″.
- Length: Using two 4′ x 2′ plywood sheets made an 8′ long teeter totter easy to build, and it’s also a great length for all of our riders – from balance bike to XS adult bike.
Building Ideas
- Our build was super simple, and much easier than a platform ramp. Where you place your fulcrum will determine the steepness of the teeter totter. You may want to attach the fulcrum with a few screws and then test out your height before you choose its final placement.
- A teeter totter can also be as simple as a plank of wood resting on a round piece of wood.
Building Plans
- This teeter totter build has adjustable heights and is an easy video to follow. Check out Mitre 10 New Zealand’s Teeter Totter (or seesaw).
- This DIY Teeter Totter Build shows you how to use leftover wood, as well as create adjustable heights.
Skinnies
Skill Level: Beginner to advanced
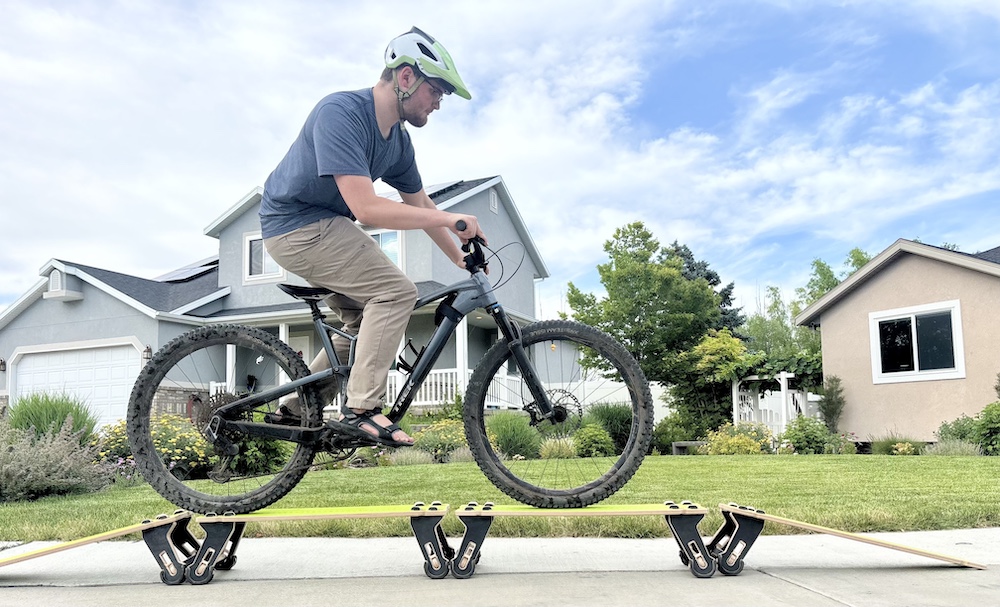
- Beginner Riders: Skinnies – as we call them in the bike community – are great for beginner riders and have little consequence when practiced on the ground or only slightly elevated. Skinnies promote balance.
- Balance Bikes: “Skinnies” for balance bikes should just be a painted line or very thin piece of wood. If a balance bike rider rides up on an elevated skinny, it makes it difficult for them to reach the ground except with their tip toes.
- Intermediate/Advanced Riders: For advanced riders, create narrower skinnies and elevate them higher off the ground. More technical skinnies promote not only balance, but practice with shifting your body weight while on the bike.
Purchase Options
- MTB Hopper’s Skinny Set: A modular set of 7 wood-topped segments and 13 pairs of legs that snap together into skinnies, turns, small ramps, or a balance “swing,” in four lengths (25″–99″) and four heights (9.4″–25.6″).
DIY Skinnies – Tips and Hacks
You really don’t need wood working skills to create skinnies for your kids. It can be as simple as spare planks of wood resting on the ground.
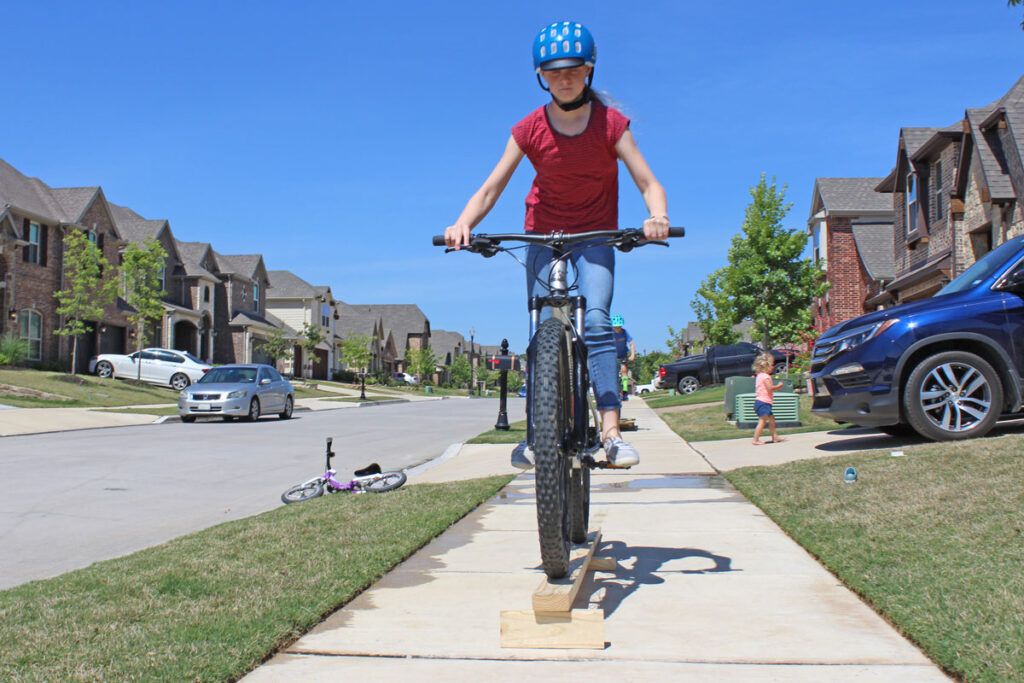
With the skinny above, we simply used scrap 2 x 4’s from our teeter totter to create a slightly elevated skinny.
Rock Garden Features
Skill Level: Beginner to advanced
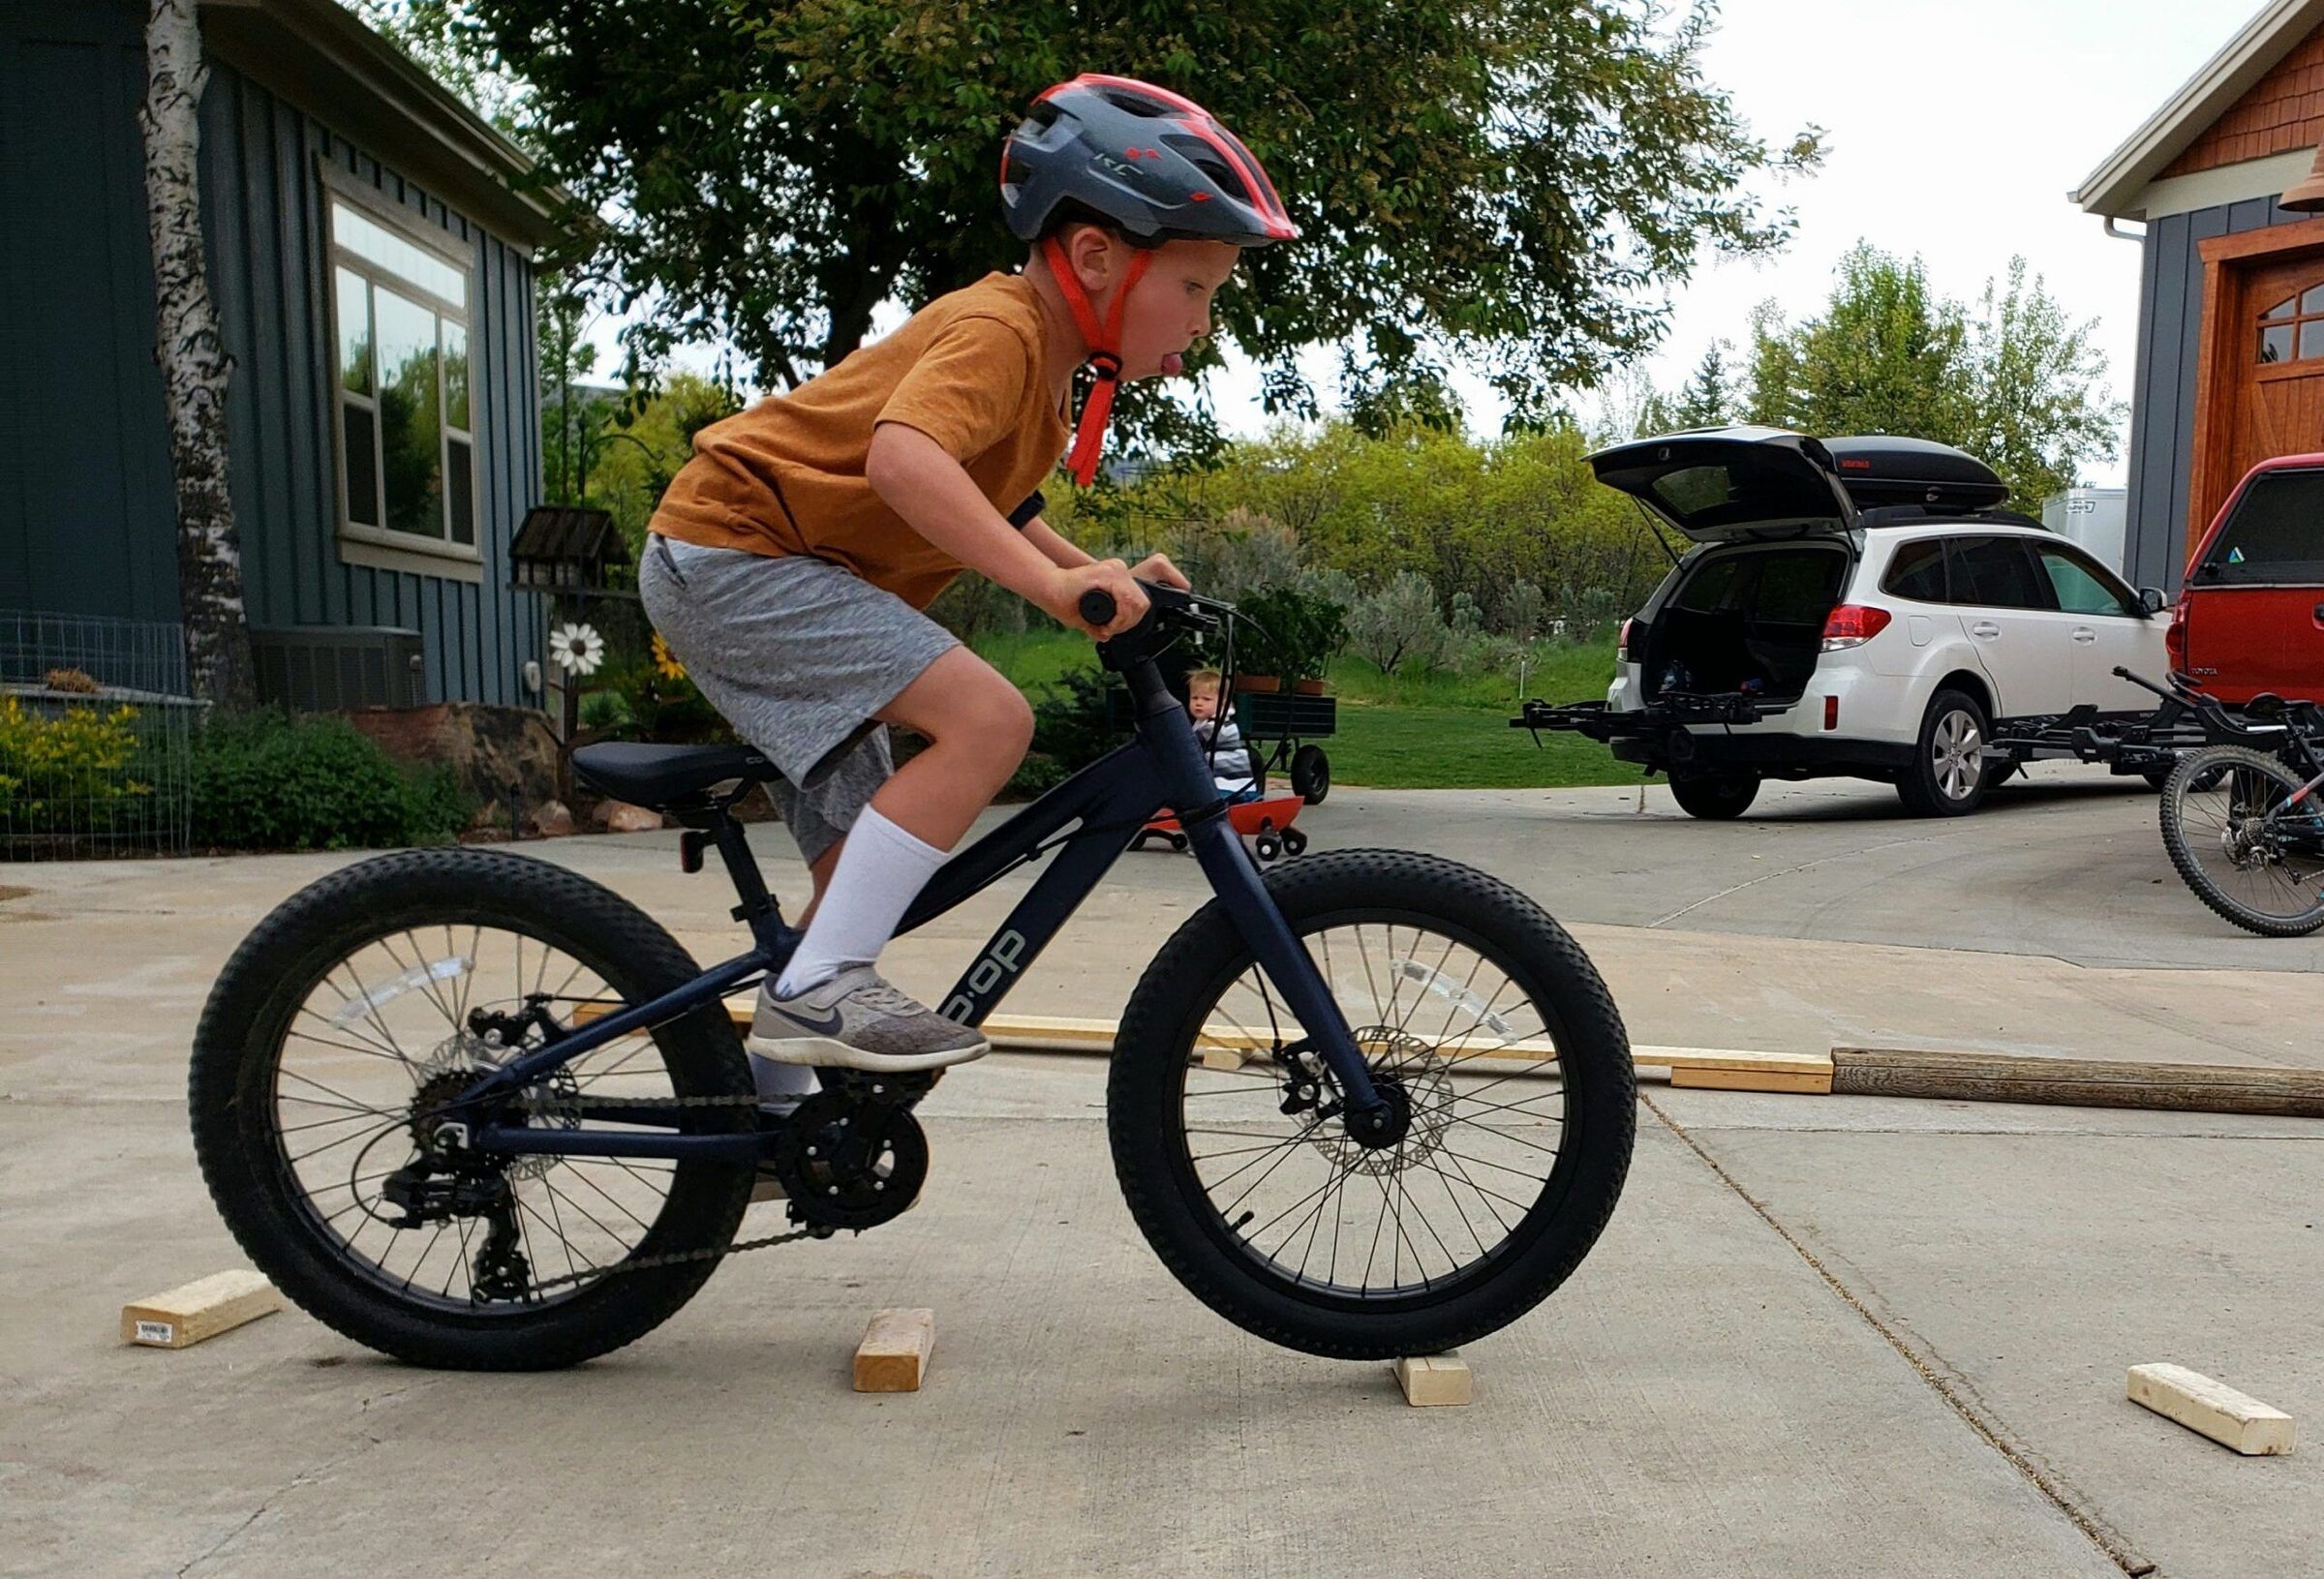
Rock garden features help riders learn the art to obstacle riding. Obstacle riding refers to any rock, root, stick, curb or thing in your way that you need to clear on your bike.
- Beginner Riders: Beginners should use a simplified rock garden feature with small obstacles. This is where beginner riders start to learn the front wheel lift, an instrumental skill for more technical obstacle riding later on. Even kids who never trail ride or mountain bike benefit from knowing how to ride up and over something like a curb!
- Balance Bikes: Balance bikers can also enjoy simple rock gardens. They won’t gain much skill development, but they can still have fun learning to maneuver and occasionally lift their bike through different terrain.
- Intermediate/Advanced Riders: Advanced riders who’ve mastered the front wheel lift should practice more technical rock garden features with larger obstacles. These teach riders how to shift body weight appropriately through obstacles, and how to lift the rear wheel to clear them.
Rock Garden Purchase Options
- Byclex Rock Garden: Portable, wood construction with antislip paint.
DIY Rock Gardens – Tips and Hacks
Rock gardens require the least amount of woodworking skills. Simply find a patch of dirt and partially bury some rocks in your backyard! Or use small pieces of wood scattered over the driveway to simulate a rock garden feature, or attach the wood pieces to plywood.
For a more sophisticated portable rock garden, purchase rock climbing holds and screw them to plywood or some type of plank.
Complete Backyard Build by Tim Tucker
One of our favorite members of our Two Wheeling Tots community is Tim Tucker extraordinaire, who has given us a peak into his amazing backyard. He also shared some of his experience and wisdom gained through his backyard building. But first can we appreciate his beyond epic backyard?
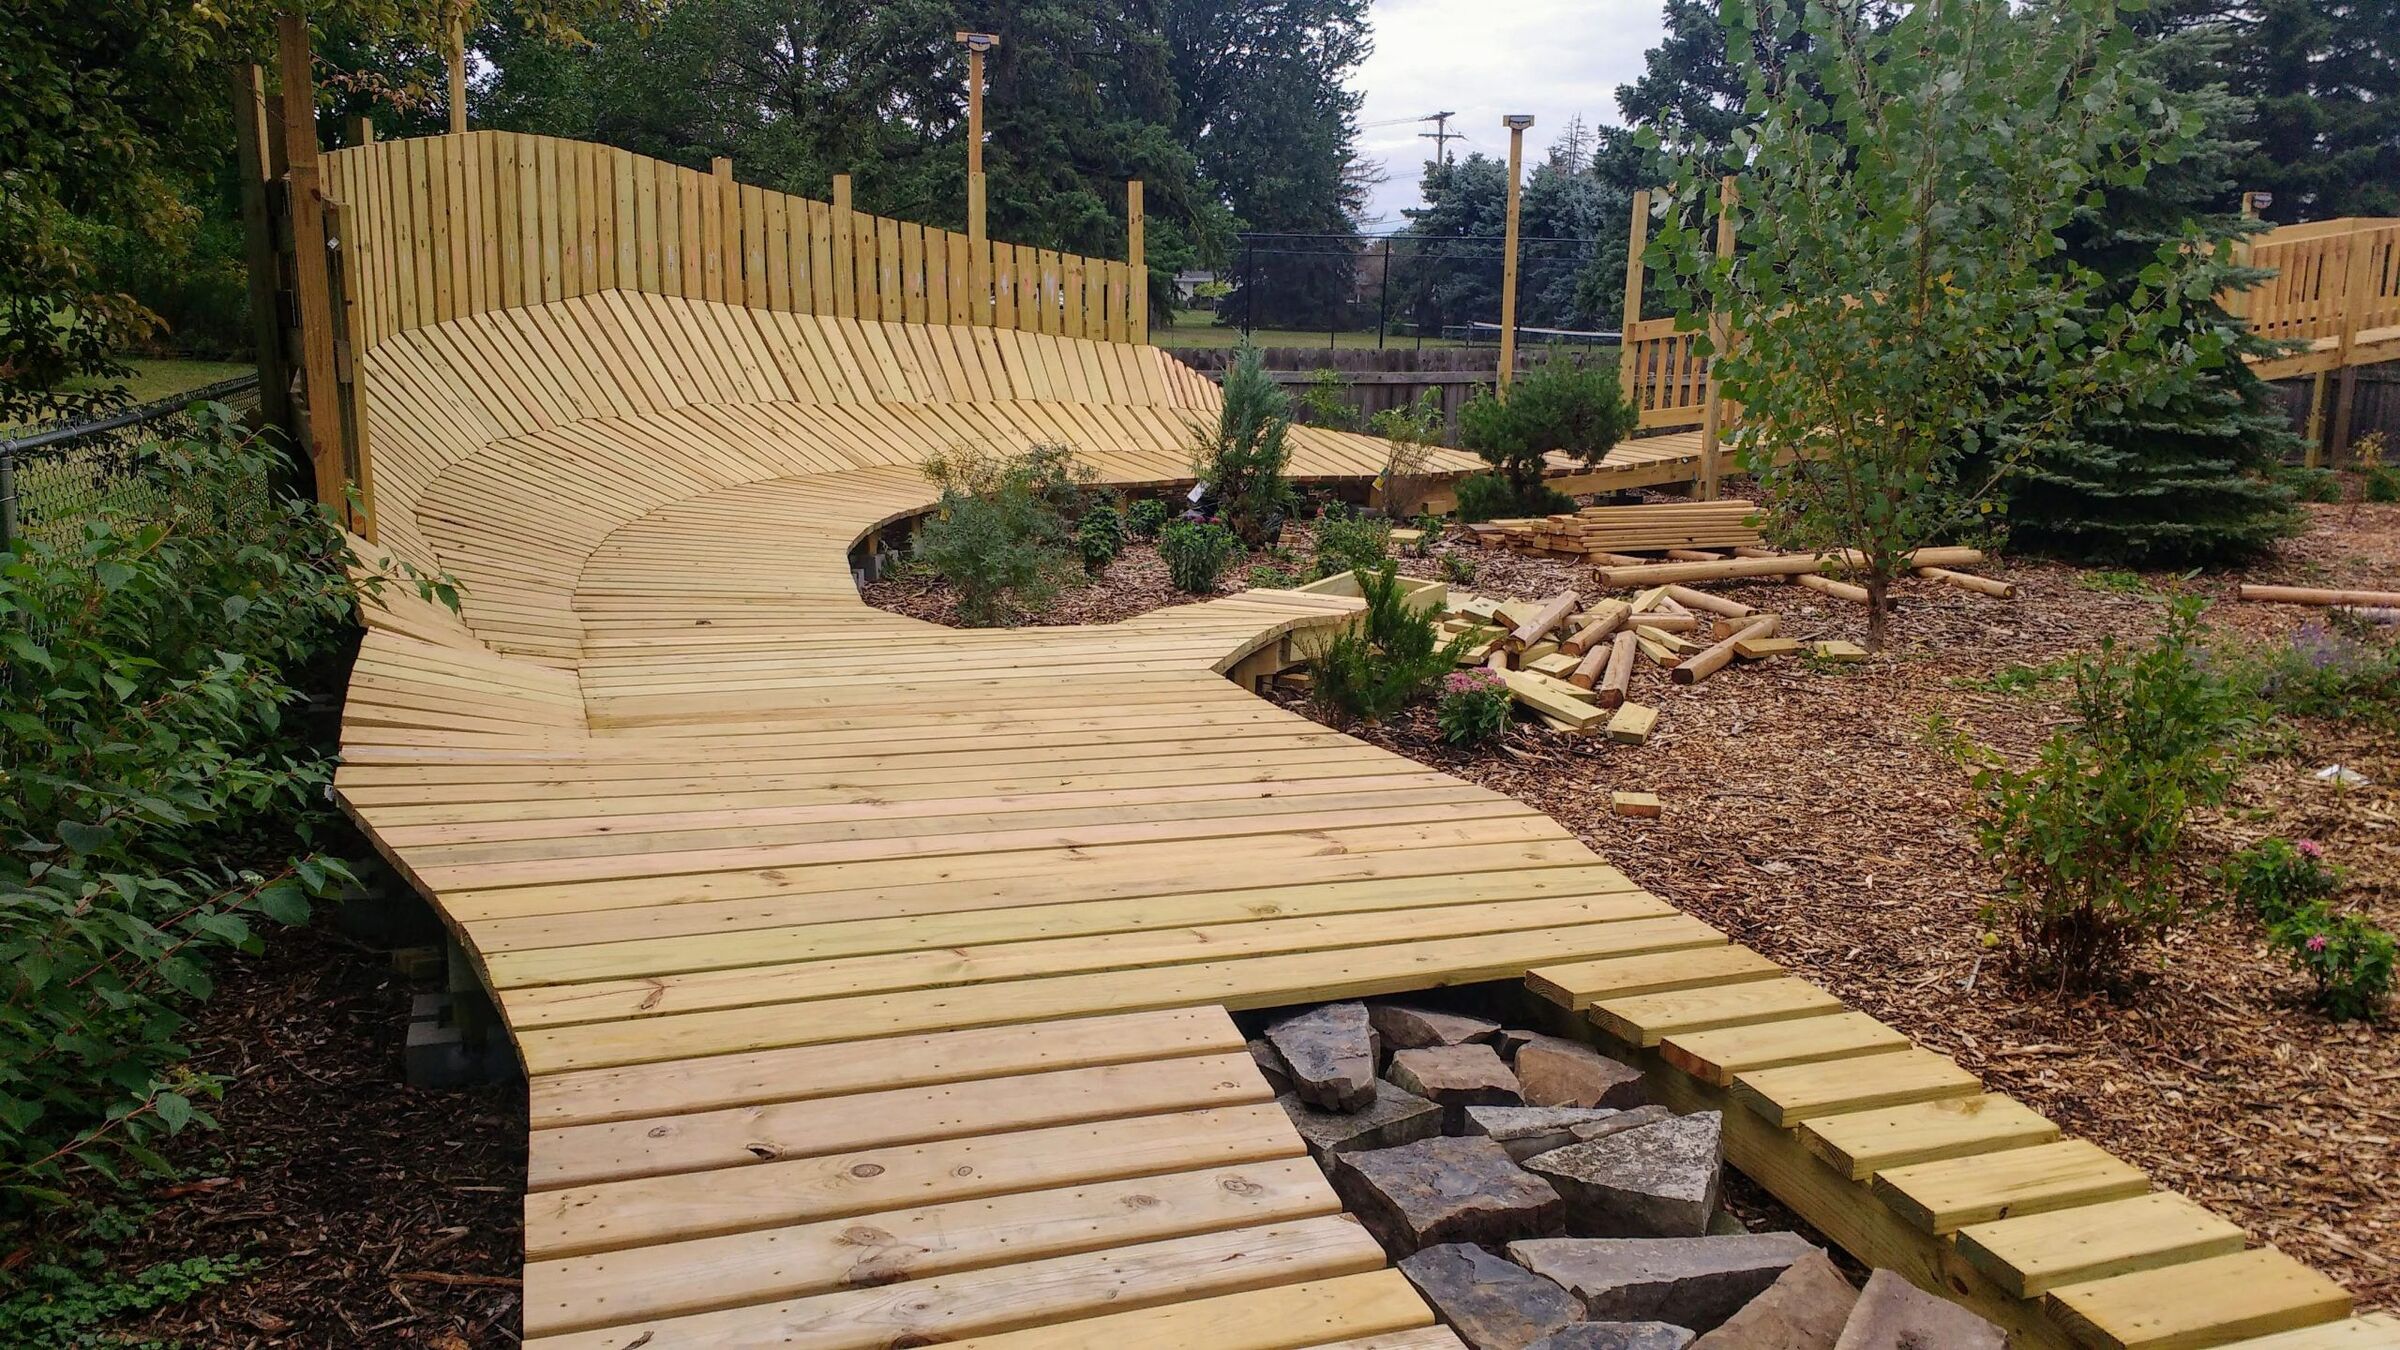
Backyard Kids Bike Ramps – Building Tips and Hacks from Tim Tucker
- When building for kids, keep features straight forward and focus on one thing at a time i.e. bumpy, steep, narrow, rolling, etc.
- You will find that there is a fine balance between building something that will be challenging and building something that is too intimidating to ride. You’re almost guaranteed to get it wrong sometimes.
- 90% of materials used are treated 2×6’s and 3″ deck screws.
- 2×6’s cost about the same as decking, but are more flexible in what you can use them for. They are also rated for ground contact and should last longer.
- Mowing and weeding underneath features is a pain. We put wood chips under everything. You can also put cardboard down underneath the wood chips to further prevent weeds and grass from growing.
Kids Bike Ramps FAQs
What materials and tools will I need to build a DIY ramp?
This is not a comprehensive list of every tool or piece of material needed in every ramp scenario. But in general this is what you can expect to need.
Tools:
Circular Saw or Table Saw
Circular Saw or Miter Saw
Jig Saw
Power Drill
Tape Measure
Safety Glasses
Helpful but not absolutely necessary:
Sander
Clamps
Level
Speed Square
Chalk Line
Carpenter Pencil
Saw blades to cut metal sheeting
PVC Pipe or Flexible Ruler – to trace curved ramps
Materials:
Wood for framing and structural support (make sure wood is straight when purchasing
Wood for deck and sides of ramp (commonly plywood is used)
Screws (recommended to be exterior grade i.e. deck screws)
Pipe – if following teeter-totter builds referenced – Mitre 10 New Zealand’s Teeter Totter (or seesaw) and DIY Teeter Totter Build. Not all teeter-totter builds need this.
Steel Pipe Straps – if following teeter-totter builds referenced – Mitre 10 New Zealand’s Teeter Totter (or seesaw) and DIY Teeter Totter Build. Not all teeter-totter builds need this.
Helpful by not absolutely necessary:
Sheet Metal – for smooth transition
Finishing Washers
Caster wheels / handle
Stain / Exterior Grade Paint
Where can I find building plans?
YouTube is littered with building ideas and plans. There seems to be more videos showing how to build ramps versus physical building plans. We have included a few building plans per ramp mentioned above.
Roller Ramps
Seth’s Bike Hacks Family Ramp. It will not work for balance bikers.
Backyard Trail Builds. The perfect wood roller, intended for a backyard pump track!
Backyard Pump Track follow-up video, on rollers and pump track.
DIY Wood Roller Build by Nj Jefferz. He designs his rollers to stack and store well next to each other.
Tabletop Ramps
JGentryMTB. This one is great for balance bikers!
I Like to Make Stuff. You get 2 different style ramps with this build -a tabletop and a kicker!
Kicker Ramps
Sam Pilgrim’s kicker ramp is so portable it can fit in your bag!
Seth Bike Hacks Kicker Ramp Build
Undialed Kicker Ramp This ramp is 1.5′ high and 4′ long.
Teeter Totters
Mitre 10 New Zealand’s Teeter Totter (or seesaw) Easy video to follow and teeter totter has adjustable heights.
DIY Teeter Totter Build from leftover wood.
How will I transport my ramp?
Transporting your ramp may be difficult, especially if you build a DIY roller or tabletop. They are going to be big and bulky. We have used different hacks like putting wheels and handles on our ramps for easier transporting. DIY kicker ramps tend to be more transportable than rollers and tabletops.
We listed two portable DIY kicker ramp options in our kicker ramp section – Seth Bike Hacks and Sam Pilgrim (so small it fits in a bag).
The best solution for easy transporting is purchasing a ramp that breaks down. Companies are building light weight ramps that easily condense down. We tested out the Byclex Yumpy and loved how their kicker ramp folds up into a backpack! Talk about easy. You may also want to check out MTB Hopper Intro Ramp or Freshpark Portable Wedge Kicker.
While a ramp being big and bulky makes transporting hard, the weight of a ramp is often the biggest barrier in transporting – even in just getting it in and out of the garage!
Aren’t DIY ramps really heavy?
DIY kids bike ramps can be extremely heavy. This isn’t a big deal if your ramp has a permanent spot in the yard, but for parents moving ramps around a heavy ramp can be a real pain. Here are a couple of hacks we’ve used to make our DIY ramps lighter.
Use smaller pieces of wood for framing and supports. In our DIY roller ramp, we used 2×3’s instead of 2×4’s to save weight, just be careful you’re still building a well-supported structure.
Using plywood for the deck of your ramp is lighter than building a deck with 2×6’s or another wood block dimension.
Slat the deck of your ramp to save weight — but know that slatted ramps aren’t great for balance bikers!
If weight is a real concern, we recommend looking at purchasable ramps instead.
What if I live in an apartment?
If you live in an apartment, storing, transporting, and weight are going to be important factors. With limited storing space, building a DIY ramp may be difficult.
You could try the DIY kicker by Sam Pilgrim (so small it fits in a bag). Or check out these purchasable ramps Byclex Ramps, MTB Hopper Intro Ramp or Freshpark Portable Wedge Kicker.
Both of these ramps condense down so small you could easily store in a closet, under a bed, or on a balcony. You could also look at our Kid-Friendly Bike Park Directory to see if there are bike parks or pump tracks in your area!
Where do I store my ramp?
Before building or buying a kids bike ramp, you will want to ask the question of how or where you will store your ramps. If your ramps have a permanent location in the backyard, then the answer is easy. But if you will be storing in the garage, house, or side yard then here are a few considerations.
Storing the ramp tilted on its side saves considerable floor space.
You may want to consider a purchasable ramp. We would recommend Byclex Ramps, MTB Hopper Intro Ramp or Freshpark Portable Wedge Kicker. These ramps condense down so small, you could easily store in smaller, tighter spaces.
There are some smaller DIY builds that would accommodate those with limited storage space. You could try the DIY kicker by Sam Pilgrim (so small it fits in a bag).
There are DIY builds that are designed to store better. Check out Nj Jefferz’s DIY Wood Roller Build. His rollers are designed to stack and store efficiently.
You could try to mimic Timberfly’s Russian Roller Ramps that stack and store inside of each other. We wish Timberfly Ramps shipped to the U.S., otherwise they would be included in our purchase options!
Can I use leftover wood?
Absolutely! Use what you have around the house. You may be limited in creating certain dimensions or using the lightest weight materials, and you may still have to make a pit stop at Home Depot.
If nothing else, use your leftover wood to create skinnies and other obstacle courses for your kids. You can even just take a piece of 2×4 and saw it into 4-5 inch pieces and scatter them along the driveway to simulate obstacle riding or “rock gardens”.
What is the best way to protect my ramp from weather or the elements?
Use treated lumber. Tim Tucker mentions above that he prefers to use treated 2×6’s to make his ramps last longer.
If you have the time and willpower, painting your ramp with exterior grade paint will make your ramp last longer. Ideally, you would paint the entire ramp as the paint will help with weather protection and other elements like humidity, sun, hot dry air, etc. If you don’t paint your ramp try and store in the garage, shed, house or under a tarp.
Some choose to surface their ramp with Masonite. It is recommended to waterproof your Masonite as it will also absorb moisture and rot.
In addition to waterproofing or painting your ramp, use exterior grade screws (like deck screws) to help the longevity of your ramp.
Don’t want the hassle of a wood ramp? One of the best weather proof kids bike ramps you can purchase is the Freshpark Portable Wedge Kicker. Freshpark ramps are made with powder-coated steel that will last 10 times longer than wood ramps. The price isn’t half bad either.
Any other resources?
Here are other resources to look at if you want more information and more advanced building.
- Backyard Trail Builds Youtube Channel
- Pump Track Nation Guide Book — it’s geared towards dirt pump tracks, but the observations about spacing and geometry for features also apply to anything made from wood.
- MTB Trail Building on Reddit
- MTBR’s Trail Building & Advocacy Forums
- Whistler’s Trail Standards — the section on technical features is helpful for building to manage risk.
- Kid-Friendly Bike Park Bucket List – Professionally made bike parks often provide some of the best inspiration!
Big thanks to Tim Tucker for sharing all these awesome resources for our readers!
FTC Disclosure: Affiliate links are included in this review. No monetary compensation was provided for this review, however, some of the reviewed products were supplied by the manufacturer or distributor to help facilitate this article. All opinions and images are that of Two Wheeling Tots LLC. All content and images are copyrighted and should not be used or replicated in any way. View our Terms of Use.